- Visual Scheduling Tips & Tricks
- Visual Production Scheduler (VPS) for Dynamics NAV
- Coding tips (for partners)
-
Visual Advanced Production Scheduler (VAPS) for Dynamics 365 Business Central
- Support
- Release and version status
- Installing the VAPS
- Look and feel of the visual schedule
- The view color modes
- Setting up the VAPS
- Integrating with Microsoft Dynamics 365 Business Central
- Finite Capacity Scheduling Instruments
- Simulations
- Day-to-day use cases
- Coding tips (for partners)
- API Events VAPS
-
Visual Production Scheduler (VPS) for Dynamics 365 Business Central
-
Visual Jobs Scheduler (VJS) for Dynamics 365 Business Central
-
Visual Production Scheduler (VPS) for Dynamics NAV
-
Visual Job Scheduler (VJS) for Dynamics NAV
Add custom fields to the VPS
In addition to the default fields available in tooltip and label, it is possible to equip five internal custom fields with data to use them in tooltip and bar label
This is how it's done
Step 1
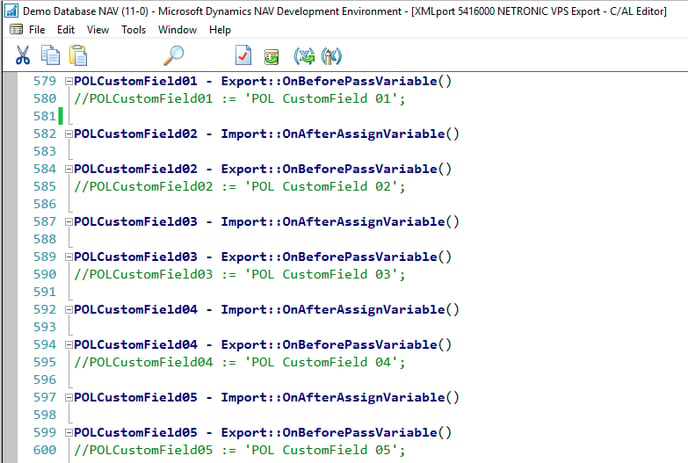
Open the C/AL code of the XMLport 5416000 NETRONIC VPS Export and adjust the assignments for the variables as described below. The necessary code lines are already present, but have to be activated:
- POLCustomField01 ... 05
- PORLCustomField01 ... 05
- WCCustomField01 ... 05
- MCCustomField01 ... 05

Step 2
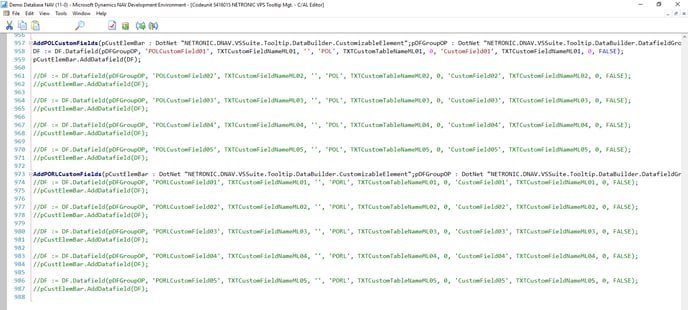
In the codeunits 5416015 NETRONIC VPS Tooltip Mgt. and 5416016 NETRONIC VPS Label Mgt. you find the procedures Add*CustomFields for the variables having been defined before. In the procedures, you’ll find some demo code you can activate and adjust to your requirements.

Step 3
Save and compile all your modifications.
Result
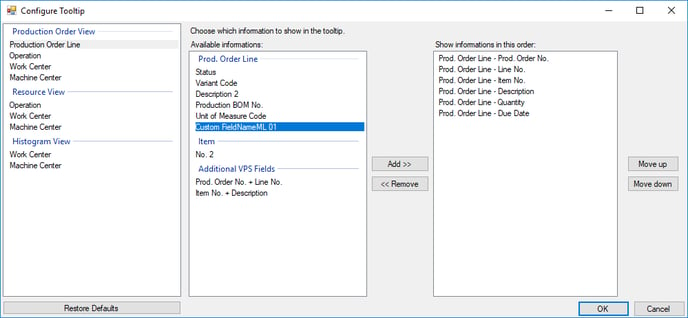
The newly defined fields are now available in the “Configure tooltip and label” menu in the VPS.

