- Visual Scheduling Tips & Tricks
- Visual Job Scheduler (VJS) for Dynamics NAV
- Getting started with the VJS (for partners)
-
Visual Advanced Production Scheduler (VAPS) for Dynamics 365 Business Central
- Support
- Release and version status
- Installing the VAPS
- Look and feel of the visual schedule
- The view color modes
- Setting up the VAPS
- Integrating with Microsoft Dynamics 365 Business Central
- Finite Capacity Scheduling Instruments
- Simulations
- Day-to-day use cases
- Coding tips (for partners)
- API Events VAPS
-
Visual Production Scheduler (VPS) for Dynamics 365 Business Central
-
Visual Jobs Scheduler (VJS) for Dynamics 365 Business Central
-
Visual Production Scheduler (VPS) for Dynamics NAV
-
Visual Job Scheduler (VJS) for Dynamics NAV
Modify an existing menu suite (NAV object) in the Visual Scheduling Suite
Our default menu suite can easily be modified
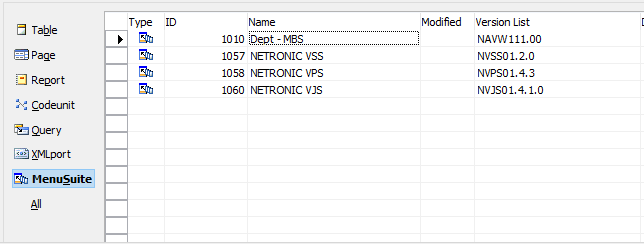
First, have a look at the list of the menu suites needed by our Gantt chart add-ins:

Individual customization
- Click the already existing menu suite usually needed for our NVSS in the object designer of the NAV development environment and export it as FOB file.
2. After having exported it successfully, the menu suite has to be deleted in the NAV development environment.
3. After this, load the menu suite (part of the FOB file) of our Gantt chart add-in and immediately export it as TXT file.
4. Open an editor and load the file, replace the ID (10xx) in the first line with a not yet used number of the existing menu suites and save the file.
5. Remove the NVSS menu suite loaded in step 3 and reload the saved files (TXT of step 4, FOB of step 1) in the NAV development environment.
6. Finally, mark and compile all menu suites.
