As a basis for creating your own language translations of the VJS, we provide the English xlf files. These files can be found in our NETRONIC Partner Community on Microsoft Teams, under Files -> Demo Versions and Runtime Packages -> For Dynamics 365 Business Central. There, you need to select the desired VJS and BC versions:
How to proceed:
- Translate our xlf file of the NETRONIC VJS.
- Write an extension using our NETRONIC VJS xlf file, which you install on top of the NETRONIC VJS.
- Create an extension inside the VSCode using the “AL:Go!” command.
- Delete the al files in the project, because translation extensions do not contain any al files.
- Create a directory “Translations” in the root of the extension and save the translated xlf file of the NETRONIC VJS to this folder.
- You must reference the extension to be translated using the dependencies section in the app.json file. As example, we have created an Italian version.
- "dependencies": [{"appId": "9a08bc1f-7ac9-4671-b212-9076b2869e80
","name": "Visual Jobs Scheduler","publisher": "NETRONIC Software GmbH","version": "x.x.x.x"}] - "idRanges": [{"from": 60000 ,"to" 60100 }] Please replace this range with the range of your tenant customization
- "features": ["TranslationFile"]
- "supportedLocales": ["en-US","it-IT"]
- "dependencies": [{"appId": "9a08bc1f-7ac9-4671-b212-9076b2869e80
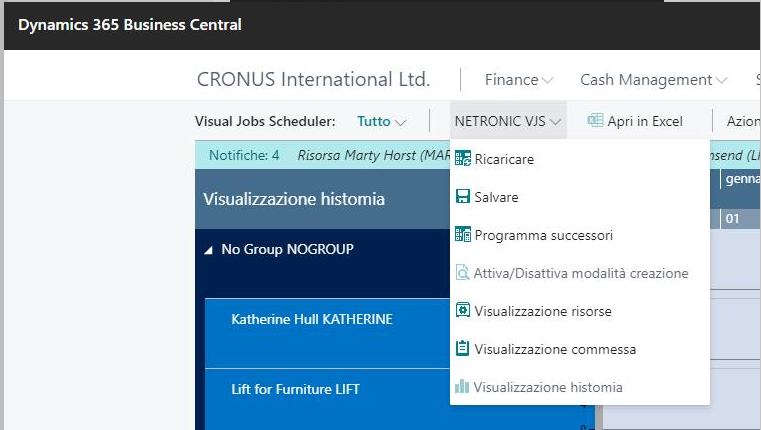
- Compile and install the extension to Dynamics 365 Business Central and the VJS appears with Italian menus, labels, etc.: