The VPS offers two kinds of filters, the difference between them lying in the time of application.
The data filter
The settings of the data filter are evaluated on reading the data either when the VPS is started or the data is reloaded thus allowing to reduce the amount of loaded data. So you can make sure that only filtered data are handed over from NAV to the VPS. If the VPS Web Client is used in addition, the filtered data is used as well so that the Clients’ view always remain identical.

Click the "Configure Data Filter" button in the “Setup” dialog to open the according dialog for defining and editing filters.
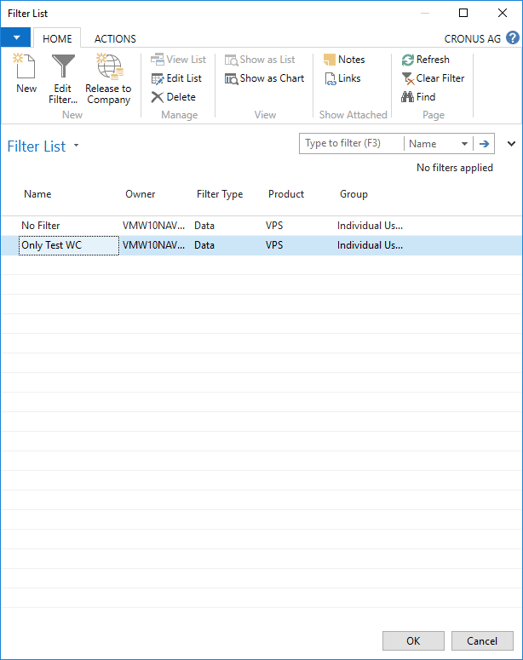
The dialog "Filter List" opens up where you get an overview of your existing filters and where you can create edit, and delete them.


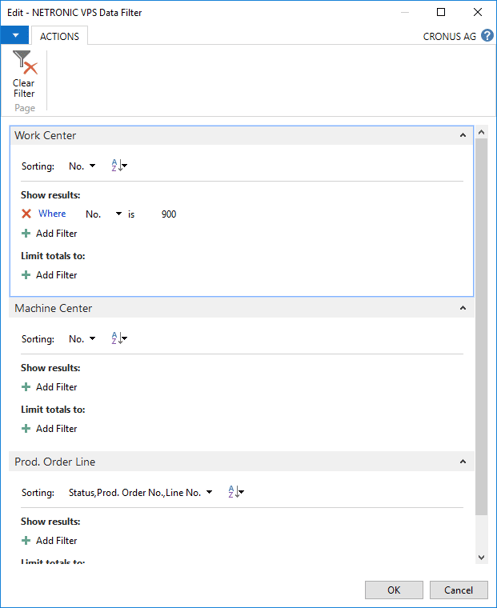
Select an existing filter and click "Edit Filter" to open the according dialog and specify your filter settings. You can filter by work centers, machine centers and production order lines:
 Click this icon to create a new filter:
Enter the name and then click the "Edit Filter" icon to specify the settings of your new filter.
 If you want to make a certain filter available to your colleagues also using the VPS, click “Release to Company”. Your colleagues will then have this filter also in their filter list and can apply it but they won’t be able to edit it.
The view filter
The view filter is applied to data already having been loaded into the VPS. All filter options can be found in the “View Filter” area of the menu bar:

The meaning of the icons in detail:
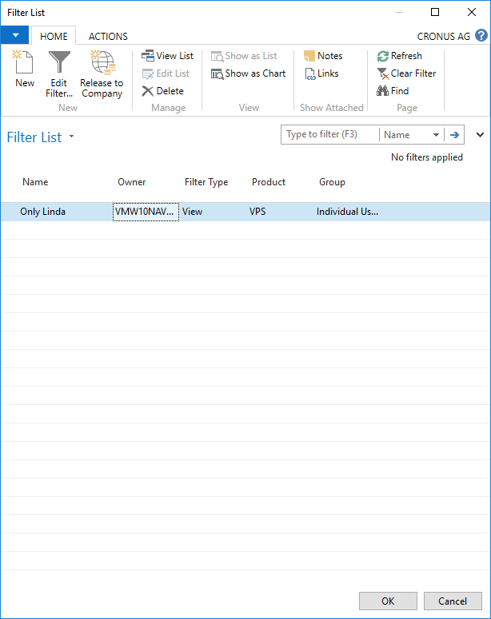
- Configure Filter: Opens the dialog “Filter List” dialog shown below where you get an overview of your existing filters and can create, edit, and delete them.

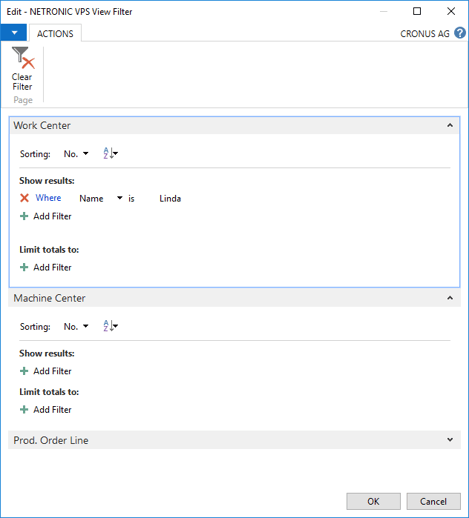
 Click "Edit Filter" to open the according dialog and specify your filter settings. You can filter by work centers, machine centers and production order lines:

 If you want to make a certain filter available to your colleagues also using the VPS, click “Release to Company”. Your colleagues will then have this filter also in their filter list and can apply it but they won’t be able to edit it.
- Activate filter: Apply the filter you have selected in the filter list.
- Deactivate filter. Show the complete plan again.
